
Udemy PS Chris Barin 7.1-7.13 & 63-75
63.04-7.1
Selection Explained
选择工具的诠释
框选工具是选择后只对选区进行更改。蚂蚁线模拟黑线条定义选区边界,用框选 套索 快速选择 魔术棒 钢笔工具。需要用Ctrl D去选择,主菜单选择-去选择。加入矩形框选,用Ctrl+S不小心触碰Ctrl+A了,现在画布都被选中了,但是近观身处其中看不出,但是发现Ctrl+T变形功能热键调不出来,Ctrl+0退出来检查是不是画布被误选了,Ctrl+D去选择。羽化创建新图层,拖拽选区,创建新图层,Alt+Delete填充黑色。如你所见,羽化数值增加到50像素,重复过程,边缘被软化的,逐渐平滑转化。by isolating certain areas, colors, objects, so on. i'm getting incredible control over my project. this intimate black line that constantly moves around defines selection, which usually referred to as the marching ants. in general, we'll use the marquee lasso, quick selection tool, magic wands, pen tool. you need to deselect with Ctrl D, go to top menu, from select, go to deselect. i'll add a rectangle on screen and say i've used Control S and inadvertently hit control A as well, now my canvas is selected, but i have no idea because i'm too zoomed in, now i'll try to transform this rectangle with Ctrl T, but nothing happens. because i have an active selection, photoshop doesn't let me enter free transform mode, when i double zoom out with Ctrl 0, and see if you have a selection active, in that case use Ctrl D.selections can be feathered through this area from the optional bar, without a feather, i'll drag a selection and i'll create a new layer, now i'll use Ctrl D, Alt Delete. so i can fill it with black. as you can see, there's nothign spectacular going on. if i increase feather value to 50 pixels, i repeat the process, look what happens the edges are soft, we have a gradual smooth transition.
开启羽化后选区持续的出现选择错误,是因为相对于选区,羽化数据太高了,所以不能选框。有件事纵使PS重启程序,建议是“羽化”降到零,可以框选想边界或者想保护的区域。大多数情况。通过创建选择,灵活性让头脑清醒内心平静,避免出现不可修复的编辑。i'm constantly getting error, that's because the feather value is too high, compared to region you're trying to select. when you are trying to select, there aren't enough pixels for program to feather. thus it isn't able to make it happen. the thing is, once you set it, photoshop will remember it, even if you restart program, you want another hands, might forget about it. so my advice is to always take feather back down to zero pixels, whenever you wants a retouch area from any project. in most case, your first step is going to be the same, create selection. by creating a selection, i'm getting both flexibility and peace of mind.

64.05-7.2
Modify Selection
调整选区
不能影响结果,拖拽画布随机选区,首先,如果通过V切换到移动工具,通过点击拖拽切掉该区域,暴露背景的棋盘区域,因为图层下面没有图层。用Ctrl J移动到另一个图层,这样不会暴露棋盘区。指令用于复制图层或文件夹,选区被提取嫁接到新图层。如果热键不能主菜单,点击文件-反转,选择画布上元素,通过选择-反转选项,除了小部分不影响,大部分需要调节。羽化部分,如果选项栏没有显示羽化功能,点击任何选项工具,都可以调取羽化功能。it won't affect outcome, i'll use this one, i'll drag a random selection anywhere on canvas, so we can start exploring some of the options. first, if you switch to move tool by V with an active selection on canvas, you can cut out that area by clicking and dragging. this will reveal checkered background, there's nothing underneath layer, this only works on raster layers.because this area that was repositioned, is still on the same layer, let's undo. this command is used to duplicate a layer or folder, here it extract this selection to a new layer. this is much useful. if the hotkey doesn't work, go to top menu and click on file, revert, with another selection active, you can right click it and select everything else on the canvas, through this elect inverse option. this is fantastic for situations where you have to affect a large image, except for one small part, rather than selecting everythign and isolating tiny area. any selection can be feathered, even if you didn't use this input field from the option bar, no matter what tool you used to create a selection, you can right click and choose feather.
如果想看到选区效果,填充颜色,快捷键是Ctrl/Alt+Delete。可选的,可以用Shift+F5,可以启动填充指令,选择想要的颜色,可以看到羽化效果。如果想给选区拓展像素,下拉菜单中加选择-调节-对比选择,拓展对话框中输入数据,PS对目前选框周边拓展像素。选择-调节-缩小,勾选“效果应用到画布上”,应用于选择画布情况下。选择-调节-边界,对话框输入边界,设定选框宽度并且填充颜色。as we previsoulsy discussed, if you want to see its effect, you'll have to fill this area with color, use ctrl or Alt along with delete key, alternatively, you can use Shift F5, and this bring up the fill command, choose any color, you'll now see feather effect. if i want to include another two or three pixels in the selection. go to the top menu and click on selection from list, choose modify expand, from this pop up window, input your pixel value this is how much photoshop will add all around your current selection. here's how i'll go with something generous like 50 pixels, so you can see difference. this works the other way around, you can contract selection in case you selected too much of your layer. this command doesn't have a hotkey either. so we'll have to use that top menu yet again, select modify contract, note the apply effect at canvas bounds is helpful only if you're using Ctrl A to select entire canvas. one last feature that creates an interesting look is border, this lies in the same menu system, let me bring border up and i'll show you how easy it is to get a nice effect going, now it's applied. here i'll fill it with white.
选择-转化选择,自由变形和变形选择,名字相似,但是意义不同。19年前版本按Ctrl+T自由变形,调节选区大小,新版的默认横宽比率。新版本打破横宽比调节需要按住Shift辅助。18年以及之前的版本相反,维持横宽比需要按Shift维持。选择-变形选区,激活后出现抓手,类似用Ctrl+T调取的抓手,这次调节选区形状而不是像素大小,手动调节到你想象形状。真实项目中处理局部特殊形状用的,按Ctrl光标移动到抓手,光标形状会变,比如星号,提示扭曲的变化。可以调节到各种不规则形状。let me clear up any potential confusion, if i right click, you'll see two transform options, free transform. free transform is what you get when you press Ctrl T, thus if you selected from this list, you'll be able to resize the selected area. be aware that my selections aspect ratio is being preserved by default, that's because i'm using CC2019. hold down Shift key, this diables the new behavior, now you're free to adjust it however you want. when you use PS 2018 all way down to CS4, when you want to resize your selection, you have to hold down shift to maintain its aspect ratio, so depending on your version, shift does two completely different things. that's free transform. transform selection is highly useful. whenever you have a tricky spots, you can either select it or you can hold Ctrl key and does the same thing. as i go over my edge, my cursor chagnes, i can grab this area and full around with it, but if i hold down ctrl key, cursor change again, now i'm using distort command through it, i can adjust selection to all sorts of irregular shapes.
65.04-7.2
Modify Selections
调节选区
框选工具两个主要的,矩形框选 椭圆框选,剩下两个线性成行线性成列框选不常用。热键M,点击拖拽,矩形框选区域,再另选区域,新选择替代旧选择,去选择用Ctrl+D。在选项栏,4个徽标,一个个的介绍,第一个常用模式创建新选区,第二个相加模式,不管相互之间依赖的还是独立的。如何鉴别第二种模式,和常规模式比,可以在无限叠加不会被替代。建议保持常规模式,按Shift切换到相加模式。光标旁写入加号。第三种热键Alt相减模式。第四种交集模式很少见了。可以看到选区大小W代表宽度H代表高度。比如可以等待300像素乘以400像素出现,结果还是值得等待的。点击框选内部可以移动。the marquee tools are in dispensable for work, there're four in total, the hotkey is M, click and drag, you'll have a rectangular selection. in the options bar, you'll notice four icons, and one of them is active, the 1st one is the normal mode that creates a new selection every time you drag. the 2nd icon, when used, will automatically add to selection, no matter where you draw on canvas. it can be next to it, or it can be somewhere completely unrelated. here's the add to selection mode, cursor has a plus symbol need to it. keep it as the default normal settings, shift add to your selection, temporarily activates the second mode. removes part of your selection, hotkey is Alt, the minus symbol on cursor. the 4rd intersection, the hotkey is both Alt+Shift, you recognize it through X symbol. you can see size of your selection while you draw, W stands for Width, H stands for height. so if you want it 300 by 400 pixel selection. note that if you have marquee selected and you click inside and drag, you'll be able to reposition it, that only happens if you're inside the selection.
先选中后Shift限制长宽比得到正方形,但先Shift后选中调取第二个调节按钮,加入到存在的选择。类似的,点击后Alt四面拓展。比如往左侧拖动,右侧拓展。固定大小是你输入特定的数据,比如输入100像素乘以100,给到精确框选。推荐选项条“正常”风格,比如框选,按住空格键拖拽的同时,可以把框选内容在画布上移动。如果不按住空格键,拖拽不动。if you click and add Shift, you will constrain its aspect ratio, you'll get a square. if you hold down modifier key Shift, then click and drag, you'll change marquee tool to the 2nd mode, which is add to existing selection. click drag and hold Alt will expand on all sides, if i move to the left, this selection will go to right at the same time. finally, if you drag and hold both Alt and Shift, it will grow your selection uniformly starting where you clicked. fix size is useful when you want to input some specific value. if you click and drag, but don't let go mouse and you press the space bar key, you will be able to freely reposition it on the canvas. that's going to prove useful in just few minutes. note that you have to keep space bar down, otherwise it won't work.
66.02-7.4
Elliptical Marquee
椭圆框选
为什么保持曲线平滑勾选?99%的时间都需要平滑效果,推荐开启。比如按住Shift画出完美椭圆选框,Shift+F5用黑色填充选区,这样开关抗锯齿对比,一个平滑一个不平滑对比明显。如果选择该区域,顶部左侧拖拽别松开鼠标同时按住空格键,现在你可以移动选择区域,这是最好的移动方式。because when you zoom in to see difference, one has jagged edges, the other has smoother edges. 99% of time, you'll want a second option. so i recommend you always have the anti-alias checked. the smoothing of the edges. to see the difference, first you'll create a circle with anti-alias off, hold shift to have perfect round, then shift+F5 to fill it with black, you can also go to edit-fill, first check the anti-alias option up top. if i want to select area, if i'm not sure where, i have to constantly hit Ctrl+D to select and remark selection. if go to the upper left and drag, don't let go and hold space bar key, then you can move selection position.
在近乎选区中心的位置,用Alt拖拽,让选区从中心拓展,shift均匀完美的形状,尽可能猜测选区中心点。按住选区 Alt拓展 空格键重置位置,三键合作。这有点区别,如松开鼠标,按住空格,移动的是画布;如果不松开鼠标,同时按住空格,移动的是选区。it's to approximate where the center is then use Alt shift drag this,Alt mark the selection expand from point of origin, Shift helps you create perfect circle. that will make your selection expand from point where you clicked. hold space bar down in total. now you can reposition it. there's a bit difference. if you make your selection, let go and press space bar key, you will navigat on the canvas, if you don't let go the cursor, meanwhile you press the space bar key, you move around the canvas.
67.01-7.5
Exercise Hands On Marquees
框选手法训练
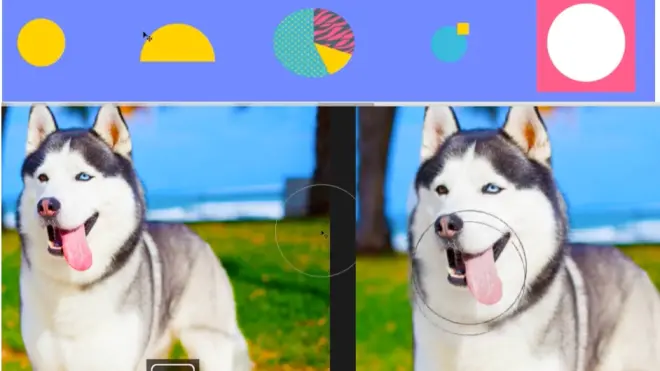
精通需要的关键技术,介绍下练习题,其中难度大的粉红色矩形中间圆形的,做选择,按Ctrl J把框选后的拖动到新画布上,让其可见,确保没有从旧图层带过来的边缘。需要删掉中间白色的,拖动粉色的矩形框。the exercies using the two marquee tools we're just talked about, the pink rectangular and the white circle in center think about after you've made your selection. this meant you should delete the white circle, then grabbed the rectangular marquee and get the reset. use Ctrl J to duplicate it and place it above this white layer in your layer panel. make it visible and make sure you don't get any blue on them.
68.04-7.6
Solution Hands On Marquees
练习题解决方案
第一个用M抓取椭圆形框选,选中居中点,别松开鼠标,同时按“Alt+Shift”,允许移动选项覆盖圆环。Ctrl J复制后放在白板上。重复该过程,用椭圆形框选,不清楚中间在哪里,找类似的方向,拖拽后用Alt+Shift结合拓展选区。当拓展的时候,时不时释放掉调节键,花上一两秒钟等待结果满意。椭圆选择被激活,开始拖拽前按Alt,需要拖拽整个区域才可以移除,因为按住Alt光标旁变成减号。如果释放掉鼠标,可以用空格键,需要的时候释放。可以留出安全的区域而不是直接切入黄色,因为可以创建另一个矩形选框切入到黄色半圆内部。M grab the elliptical marquee and zoom in really close now approximate its center, now approximate its center, click and drag, don't let go of your mouse, click and press "Alt+Shift" at sametime. this will allow you to move your selection perfectly covers circle. place this duplicate above this white layer and enable it. the 2nd half ellipse, i'll repeat the process. i'll use elliptical marquee, i have no idea where the center is, but i'll approximate it click drag and use Alt+Shift combined to expand selection. as you enlarge it, you may want to release one of modifier key from time to time, see if that helps in anyway. now your elliptical selection will remain active, now hold Alt before you start dragging. you'll need to grab entire region in order to remove it. because i'm holding Alt, my cursor has this minus symbol attached to it. if you have released your mouse click, you can also use space bar key, you can place it exactly where you need it. it's sayfer to leave a few extra pixels rather than to cut into the yellow shape. that's because you can always create another rectangle selection with Alt key and remove that extra space.
第三种变形选择是椭圆形框选,右键,用调节按钮协助调节。第四个圆形加右上角方形,椭圆形选择工具选择圆形,切换到矩形选择工具,选画布前按Shift,加入选项,可以复制,放到图层面板顶部。第五种粉色矩形和中间白色圆形,开始矩形选择工具选中粉红色矩形,合适的重置,切换到椭圆形选择工具,Alt减去,按空格键重置到中心。the 3rd one, i'll draw out an intial selection with elliptical marquee, right click and i'll choose transform selection with help of handles. i can adjust it without problems. the 4th one, now for the circle it is standard at this point, now for square part, i switch to rectangular marquee, i'll use shift before i click on canvas, that will add to selection. i can copy it and place it at top of layers panel. the 5th one, i'll initially use rectangular marquee to get a large pink shape. after pink rectangular is properly positioned, i'll switch to elliptical marquee, hold down Alt get minus symbol, space bar move around until it right.
69.04-7.7
Hide Pixels With Layer Masks
图层蒙版隐藏像素
抓取橡皮擦擦图层是开始删除像素,永久性的破坏,不能进一步编辑。如果你还想恢复进一步编辑,不可逆性的操作并没有给自己进一步编辑留有余地。为了创建一个图层蒙版,按住底部图层面板第3徽标,方形出现在图层面板缩略图里,提示关联了图层蒙版。这是问题,如果,我切换到刷子工具,黑刷子涂抹背景被抹掉,白刷子把背景刷回来。所以修修改改的在黑白刷子之间切换。bad choice would be to grab eraser tool and start deleting pixels. those changes are permanent, it's not going to allow you to do further edits. at one point, you might want them back, this applied to just about any situation. whenever possible, leave yourself options. to create one layer mask, press on this 3rd icon, from bottom of layer panel. now this white square has appeared next to my layer thumbnail. and through i can recognize i have a layer mask associated with it. here's the deal. i'll switch to brush tool and i'll start painting with black, now this background goes away, the great thing about it is i can switch it to white, now i can bring it back, i can toggle between the two and make all sorts of edits.
比如我添加漂亮的胡子,如果我改变想法了,可以关闭体现修改的蒙版功能,避免永久性的编辑。首先,区分选择图层和选择图层蒙版,被高亮凸显的缩略图就是目前活跃图层。改变前后景颜色,比如蓝色红色。切换到蒙版图层,前后景色自动切换回默认黑白色。图层蒙版就在黑白两色间工作。黑色移除,白色恢复。如果用特定颜色工作,但是工具栏只看到黑白色,找不见自己选择的色彩,说明那是选择图层蒙版了。没有选择图层。好事情保持刷子所有的特征,可以用方括号实时调节大小,改变刷子硬度,来确保交界过渡刷。after i've move forward, and i've done some other things, say add a fabulous mastache to it, i can change my mind and disable the layer mask, non destructive editing at its best. first, it's essential make the distinction between selecting layer and selecting layer mask, that's a highlight effect that shows you what you're currently working on. let me change the background and foreground colors, i'll switch to layer mask, but pay attention to area, it immediately reverted to black and white. layer masks only work iwth in these two spaces. black hides pixels while white reveals them. so black removes, white add them back in. if you're wokring with certain colors and you see the missing from toolbox, that most likely means you've selected your layer mask. you can adjust the size on the fly with square bracket keys, you can change hardness to ensure softer transitions and so on.
定制刷子,不通过面板,画布右键点击任何部位,右键调出刷子选项。注意面板蒙版白色被逐渐黑化,提醒隐藏像素了。如果想暂时的关闭蒙版功能,右键选项关闭蒙版功能。还可以选择删除蒙版功能。如何选择区域的蒙版和反选呢?可以ctrl点击蒙版缩略图,得到选择,在没有绘制基础上的选择。切换到选择工具,天幕框选,右键,反选。避免应用图层蒙版,如果这样选择,等于确认蒙版这些变化,就失去了灵活性。不确认应用蒙版调节,还可以依据情况继续调节。建议给自己留有余地。to easily customize brush without accessing panels, you right click anywhere on canvas and you get a bunch of options. please note that as you hide pixels, the initial white rectangle now slowly becomes black, that's the ps way of informing you that you're just hidden pixels. if you want to temporarily disable this mask, you can right click it, and here you'll have this option disable layer mask. you can also delete it at any point from same list. you can contrl click mask thumbnail and you'll immediately get a seleciton, this is based on area you haven't painted over. switch to any selection tool, say marquee right click and choose inverse selection. now you're free to work on region. once you do that, you basically fully commit to these chagnes, avoid the apply layer mask, you lost all flexibility. i advise you to keep your options open.
选择工具创建选区后,按图层蒙版按钮,可以在选区进行蒙版调节。Ctrl+i反转蒙版,调节除了选区之外的部分。现在把狗的黑白色调恢复到彩色。比如舌头恢复红润。默认的,我们创建调节图层,自动伴随图层蒙版,F12逆转。提高频率调节,影响整个画布,蒙版图层代表效果效应区域。比如不想影响整个狗,可以黑刷子绘制狗,保留舌头和眼睛的变化。立刻转化到原始状态。相反的效果,用X调节到默认黑白色,白色恢复原高饱和度色调。比如想用冲洗的风格,黑刷子涂抹。白刷子保持原有的像素完整无损。you create a selection with any tool and you hit this layer mask button, now you're free to work on this isolated part of photo. we can use Ctrl I to invert this mask, so now we can adjust everything except that selected part. in our first activity, we made picture black and white, now we brought back redness on lips. by default, create layer mask when you create any adjustment layer automatically, comes with a layer mask, revert with F 12.i'll crank the vibrant dramatically you can see it's now affecting entire canvas. but notice our layer mask pinpoint adjustment work on certain area. i don't want to enhance the dog, i;ll paint over him with black. immediately they revert to their original state. if i want the opposite effect, i want to enhance the dog, i'll use X to flip colors, i'll paint with white over the area, i'll wash away everything with black brush, you get all these features while still maintaining your original pixels intact.
70.04-7.8
Activity Combine Images With Layers Masks
结合图层蒙版的图层
到目前为止天空替换成新颜色,改善底部的枯燥水洗的色调,两个标签,都解锁背景,操作方式双击背景图层,新图层拖拽到旧图层里,按住shift新图层拖拽到画布中间。改变图层顺序,旧照片放在新照片上面。打开该图层的蒙版,确保前景颜色设置黑色,增加刷子大小,硬度设置到100%为了绘制顶部,现在开始绘制线条,目标寥寥数笔搞定大片天空。we'll use what we've learned so far to replace sky with new one. we'll improve the bottom part, which is dull and washed out. first i have both images open in two tabs. i'll unlock this background layer by double clicking it. i'll drag new layer from canvas over in tab. this is where we'll work. i'll hold down shift, so the ksy was dropped in the middle of canvas. i'll change order of layer, the initial photo should be above this one. enable a layer mask on this layer, make sure foreground color is set to black and increase brush size dramatically, i recommend you set its hardness to 100% for top part. now starting painting in general strokes, your goal is to do most of work in a few swipes.
绘制到山脉的时候,刷子调小,降低硬度,为了不同介质顺利过渡。在绘制山峰的情况,切换到白刷子100%硬度,保留山的像素。热键的重要性。X在黑白刷子间切换,方括号调节刷子大小的。右键调节刷子硬度。移动鼠标可以看到光标的区域来来回回,当放大进入的时候,可能分心,如果通过徽标调节前景后景也分散精力。here you'll have to shrink your brush and turn down your hardness most likely. this is so we'll get a better transition. just in case you paint over these hills, switch to white 100% hardness paint area back in. that's why these hotkeys are so valuable, X helps me switch between black and white my square bracket keys adjust my size on the fly, if you right click, you get to change hardness and few other things. i constantly mentioned you should keep mouse cursor in this area rather than constantly moving back and forth between it and when you're in the zone, you don't need any distractions coming up even if that means for a second.
绘制完毕看太阳透过云彩不是很满意,可以拖拽原来的图层。把图片下方失去生命力的裁剪掉。按Ctrl点击图层,加入曲线调节,放置图层上方,从面板,移动曲线中间线,点亮画布偏暗区域,帮助更好的看细节。频率调节。用FF点击两次,这样可以居中。调节图层的好处我们可以进一步调整。let's tackle bottom area, a first crop, it's nothing nice to look at press C to get crop tool, and with help of handles to take out section. i'll hold Ctrl and i'll click on my mask, i can dd an adjustment layer, let's go with curves, this is going to be placed above layer, from this panel, i'll grab this middle line and i'll move it up just a bit. this will lighten all these dark areas, it will help me see details that much better. choose vibrance adjustment, i'll turn up both sides significantly. by tapping the F key twice, the great thing is we can further adjust it.
71.04-7.9
Quick Selection Tool And Magic Wands
快速选择工具和魔术棒
热键W点击拖拽元素,快速选择拖拽你想要的元素。选项栏“自动增强”复选框勾选,开始方框调节刷子大小,能用热键不用菜单节省时间。按Alt程序自动的让你忽略某区域,注意到光标旁边减号,是减去某部分选区的。习惯用徽标的话,可以从左侧工具栏面板获取。技巧是拖拽选择,魔术棒工具是PS算法分辨哪些像素组合在一起。每次点击重制选项区域。如果想加区域用shift,想减区用Alt。the hotkey W underneath it , you click and drag over element, you want selected. the selection quickly expand. we need to have auto enhance checked and that's about it. we can use square bracket keys to adjust brush size. there's no need to fiddle around this menu. but if ps goes too far, you can hold down Alt and disregard that area. the minus symbol on cursor. we can click and hold directly from left panel. so you can get used to icon. the magic wand tool uses ps algorithms to figure out what pixels go together. each time you click, you reset selection. if you want to add or substract from it, you have to use shift and Alt keys, shift adds, while Alt subtracts.
容错率是对工具要求的严格程度的体现,ps相对宽松的设置在30。如果容错率太低了,需要点击很多次shift加入。如果容错率太高了,几乎都选择了,不够精准。不同的情况需要用简单可能的方式,如果相对困难,用去选择,重新换个工具选择。the tolerance is critical for the tool. this can be found in options bar. this tells ps how loosely it should look for matching pixels. if you put a value that's too low, you'll have to click lots of time with shift key held down. in general start tolerance of 30 is pretty good.
72.05-7.10
Activity Make An Orange Purple
橙色的橘子变成紫色
调节血橙颜色,用选择工具和调节图层。如何用第二选项,血橙有角度的,所以椭圆选择工具有些难度。抓取框选工具,选择橙子中间白色部分作为中心点,加入Alt而不是Shift从中心进行拖拽。右键,选择变形选项,现在用手柄,最大努力的进一步调节选项,如果简单的拖拽,可以看到还不够。进一步调节的方案是按Ctrl进一步变形选择,调节形状适应血橙。多裁剪点血橙,还是保留点血橙,取决于你。we'll manipulate this photo of blood orange by way of selection tools and adjustment layers. it's going to be difficult but that's how you'll truly appreciate the second option once we move to it. as you can see. this orange is set at an angle, so the elliptical marquee has a hard time picking up the particular shape. grab marquee tool from tool box. in this case, we can see where we should play our cursor, somewhere around this white area, click and drag a little. now add Alt to mix. right click, from list choose transform selection. now with handles, to further refine selection, if you simply drag them around, you'll see this is still not enough, we're back to where we started. to gain further control. let's hold Ctrl key this allow us to distort selection so will better fit our blood orange, if you want to limit yourself to central area or if you want to include its rim. i'll focus here and we'll tackle outer area in a moment.
下一步是色相饱和度调节,勾选上色,当色相230紫色,色相300蓝色。饱和度50亮紫色,亮度为零。按Ctrl+0,近观先框选后边缘,可以先设置羽化半径然后框选。另一个可选方案,在加入图层蒙版前重做,右键羽化选择。如果点击调节图层缩略图,得到不同的属性面板。the next step will consist of an adjustment layer that will further edit through its properties panel we can customize it through this properties panel, from bottom of layer panel, let's add hue and saturation adjustment layer. let's check colorize change color dramatically. this is going to make it blue. i want to make a purple color, go with hue value of about 300, this is going to give us a weird purple shade for saturation 50 and lightness zero. with Ctrl+0, see how you did. if we zooming close, we can clearly see this edge that's what you should expect from marquee tool, unless you set feather radius before you start selection. a good alternative is to undo before we added our layer mask, right click and feather selection.if you click on adjustment layer thumbnail, you'll see these properties panel. that's what we've seen so far, but if you click on the mask, you'll get completely different options.
点击蒙版属性选项有羽化,避免快速的重建调节选项。专注边界,缓慢的移动滑块大约10像素的位置,开始逐渐消失,选择继续40像素效果更好,橙子外面部分可以用手柄调节。确定白刷子涂抹蒙版,刷子调节硬度,因为需要平滑过渡,不饱和度50%刚刚好。尝试第二个版本,可以依赖快速选择工具,在做之前选择刷子设置,刷子大小调节到200。取决于图像大小,勾选自动调节,刷子硬度,移动到100%。快速选择工具好过椭圆框选工具。the one i'm interested in is feather. with this slider i can avoid all that hassle of recreating or modifying selection. i can focus on this edge and slowly move up slider, at around 10 pixels, it's starting to go away, but i'll continue to about say 40 pixels. this is much better. we still have this exterior part to take care of but that's easily handled with brush tool. make sure you're painting on mask with white, check hardness, because we want a smooth transition. so opacity about 50% should be fine, let's do size of about 200, this is always going to depend on size of image, auto enhance is checked, hard brush move to 100%.so quick selection is really did job much faster than elliptical marquee.
73.02-7.11
Save & load selection
保存 下载选项
大概花20分钟做的选择,如果Ctrl+Z功亏一篑了。到主菜单,点击选择下拉菜单重新选择,逆转危机,但是这是暂时性的。一旦关闭PS,还是无法恢复。如果选择Tab,会发现JEPG拓展符,这类信息不能保存。保存为PSD文件,现在选择保存选择。if i spend 20 minutes on seleciton. now i made selection back, obviously ctrl Z isn't going to work. go tot top menu, click on select, from this dropdown, choose reselect, with crisis averted, that won't work indefinitely. if you check its tab, you'll see it has dot JPEG extension, that can't retain this type of info. it's safe to save it as PSD file. now go to select save selection. then load selection from drop down choose PSD.
74.04-7.12
Activity Change Color T Shirt 2
改变衬衫的颜色
两个方案并非专业喜欢的,因为不太灵活,技术应该是非破坏性的,确保默认大小的图片。我想锁定服装,需要创建快速选择工具,增加刷子大小,确保远观时候看起来可以。近观,看到手表的问题,衣领和手指也妨碍衣服选择的问题。缩小刷子大小,开始加入区域,右侧需要额外关照,因为该区域黑暗一些,很容易把牛仔裤选进去。按Alt开始剔除多选的,Alt告诉PS不需要选区中部分像素。i want you to target shirt, so we need to isolate it, grab my quick selection tool and i'll increase my brush size to about ts, when you zoomed out everything looks better. as we move closer, you can see there're problems with watch or few issues with colar, fingers prevented my tool from going all way in. i'll shrink brush considerably and i'll start adding in these areas. on the right side will have to be extra carefully. this will tempted to select jeans as well. hold down Alt and start painting away, the more you go over an area with Alt, the better ps will do. i don't need the types of pixels in my selection.
衣领部分需要细心的照顾,色相饱和度调节,选区图层,色相蒙版了解作用于选区图层,该蒙版色相效应只作用于选区内容衣服。降低饱和度,开启着色选项,现在调大色相数值,颜色看起太明亮的显得反而不真实,降低不饱和度,不太鲜亮,显得真实。色相360饱和度50亮度-20刚刚好。选中蒙版缩略图,白刷子绘制,随之调节刷子大小和硬度。替换颜色,创建好的选区很重要,调节图层灵活处理,后续可修改。i'll leave collar alone as well as any potential areas that didn't receive enough attention, next we'll using adjustment layer, go and enable hue and saturation, the mask we had an active selection. layer mask contains only the shirt. enable colorize options. now simply move hue saturation. some colors might look a bit too bright, my advice is you turn down saturation for a realistic look. the hue value is 360, saturation is 50, for lightness use negative value of minus 20. check on mask thumbnail and start painting, use white in this case, it goes without you should adjust brush size and hardness.
75.01-7.13
Review
回顾
选择方式,快速选择如何调节,学会多训练。you've leaned about selections in general, now can you modify them then quick selection tool was a much better option for these jobs.
