
git的基本用法

# git的基本用法
## 一、把本地仓库(文件夹)放进git管辖
说明:本教程里“仓库”和“文件夹”是同义词,建一个“仓库”等同于建一个“文件夹”,程序员们在使用github时,相对更习惯用“仓库”这个名称。
### 第1步:配置自己的git
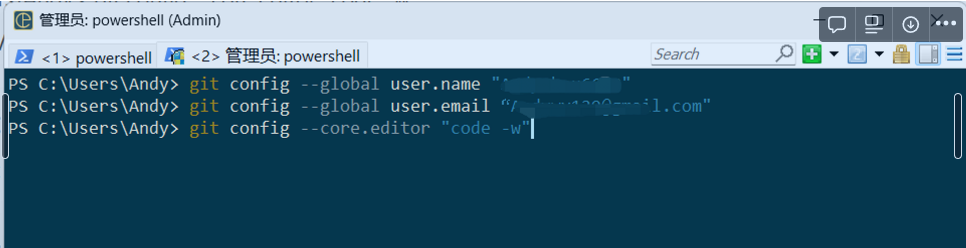
```PS C:\Users\Andy> git config --global [user.name](http://user.name/) "XXX" ``` (说明:引号里面填自己的github用户名)
```PS C:\Users\Andy> git config --global user.email "XXX" ``` (说明:引号里面填自己注册github时用的邮箱)
```PS C:\Users\Andy> git config --core.editor "code -w" ``` (说明:把Visual Studio Code设置为默认编辑器。Visual Studio Code后面简称为“VS Code”)
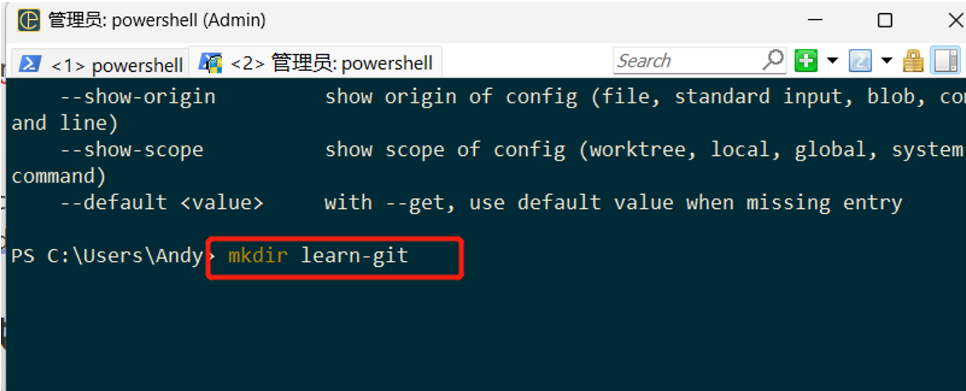
### 第2步:在本地创建一个文件夹
使用命令:```mkdir learn-git```,创建一个名为“learn-git”的文件夹
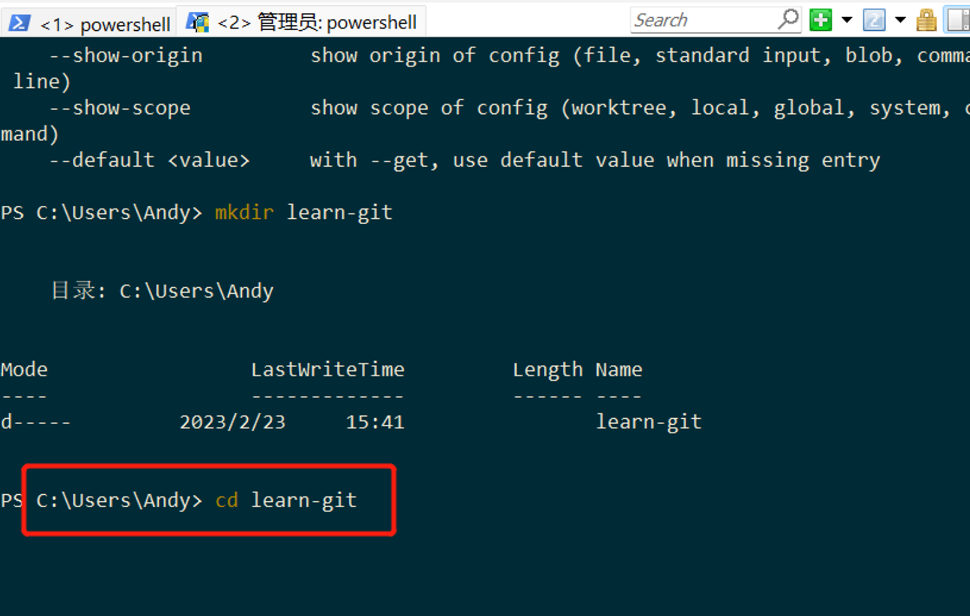
### 第3步:打开learn-git文件夹
使用命令:```cd learn-git```,打开“learn-git”文件夹
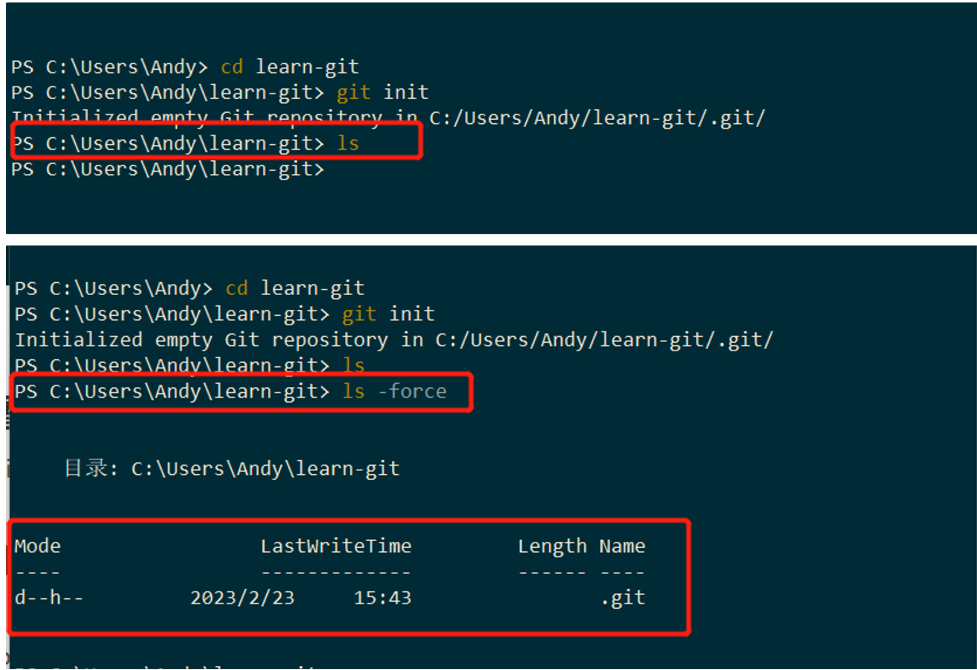
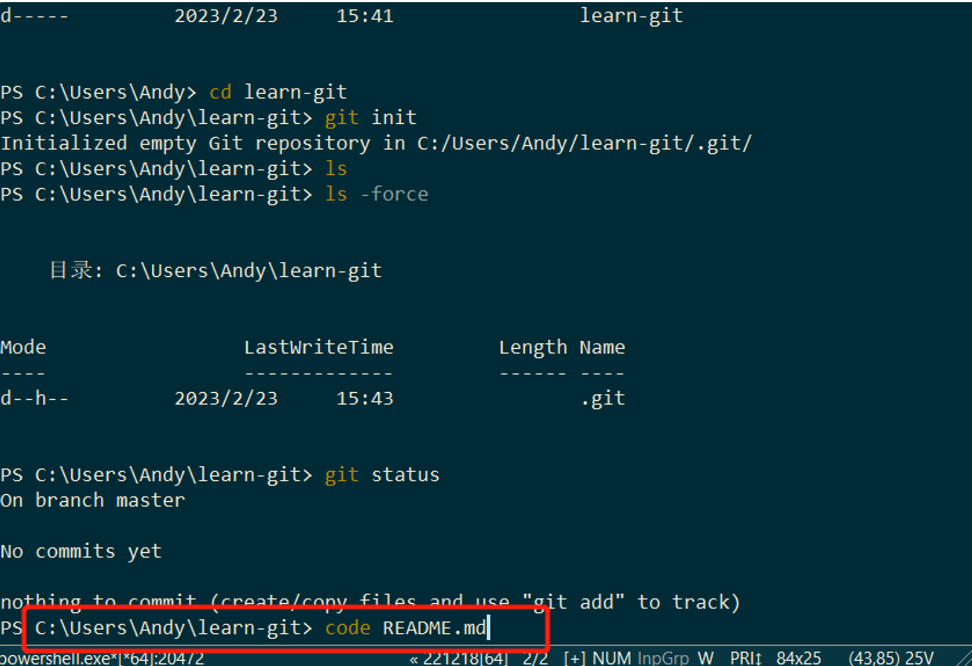
### 第4步:初始化learn-git文件夹
使用命令:```git init```, 初始化learn-git文件夹

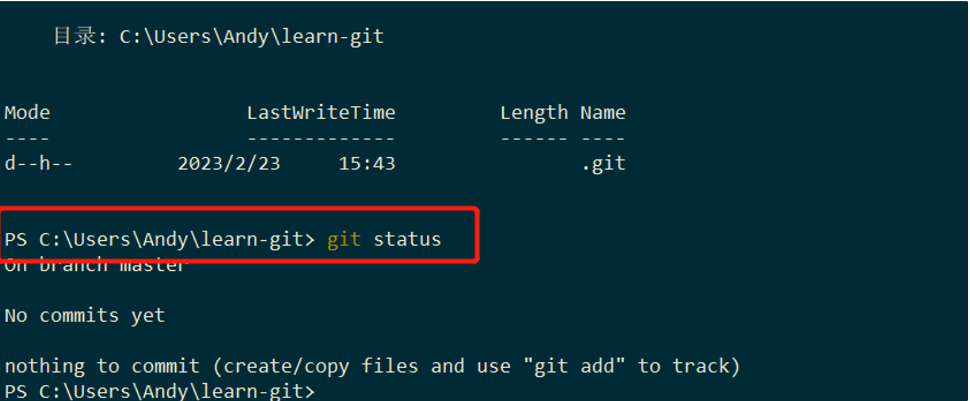
### 第5步:查看learn-git文件夹
使用命令:```ls```,查看learn-git文件夹下面的内容,由于是刚创建,所以内容为空。
说明:使用```git init```命令初始化“learn-git”文件夹后,会生成一个后缀为.git的隐藏文件夹,使用一个特殊的命令:```ls -force```,可以看到这个被隐藏的文件夹
### 第6步:使用```git status```命令查看git状态
对新手来说,这个操作很重要,我们需要从git的视角观察文件夹里的变化情况
### 第7步:创建一个README.md的文件
使用命令```code README.md```创建一个文件,命名为“[README.md](http://README.md)”, 按回车,系统自动启动Vs Code,在Vs Code界面下输入内容,然后保存,关闭Vs Code
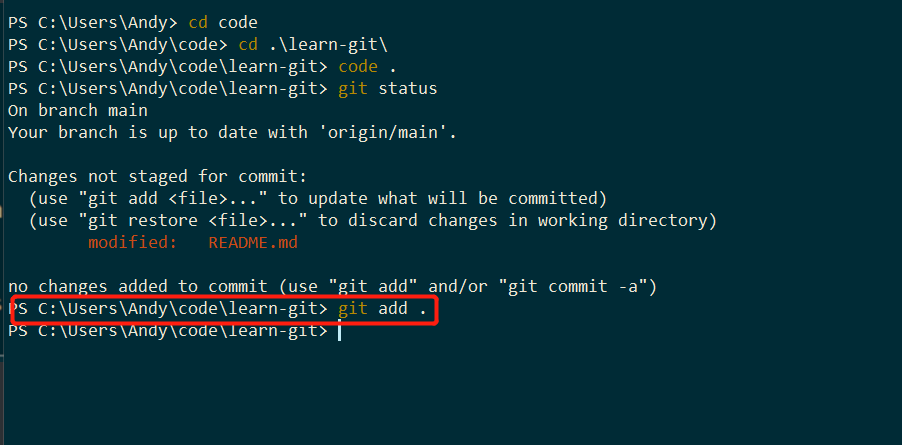
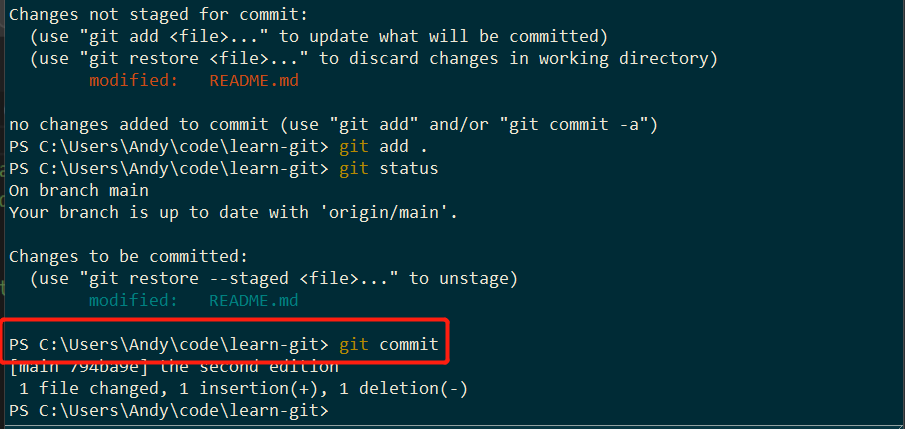
### 第8步:把经过编辑的README.md提交到git的工作区
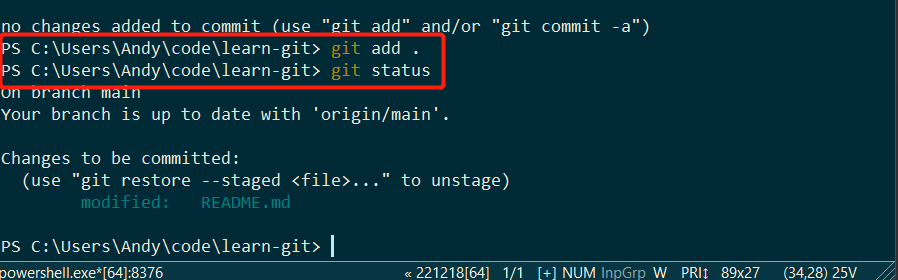
使用命令:```git add .```(注意,add后面有一个英文标点状态下“.”),把刚刚我们编辑过的README.md文件提交至git工作区。
说明:提交之后,可以再用```git status```命令查看git的状态,观察前后的变化
### 第9步:把经过编辑的README.md提交到git管辖
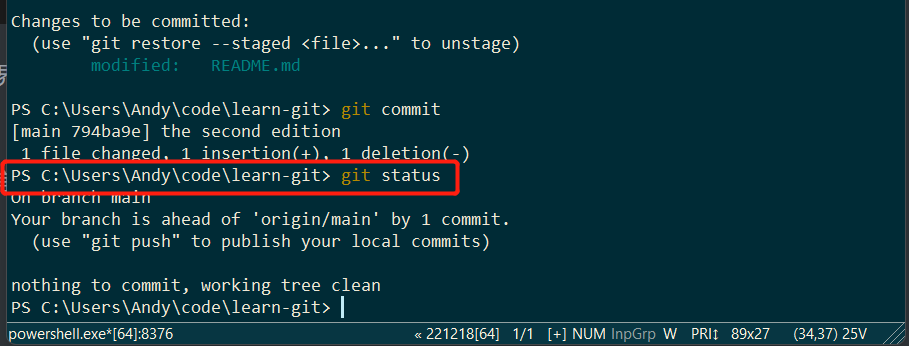
使用命令:```git commit```,把刚刚我们编辑过的README.md文件提交给git管辖,命令行界面会弹出关于本次提交的说明信息
### 第10步:在弹出来的Vs Code中填写修改备注
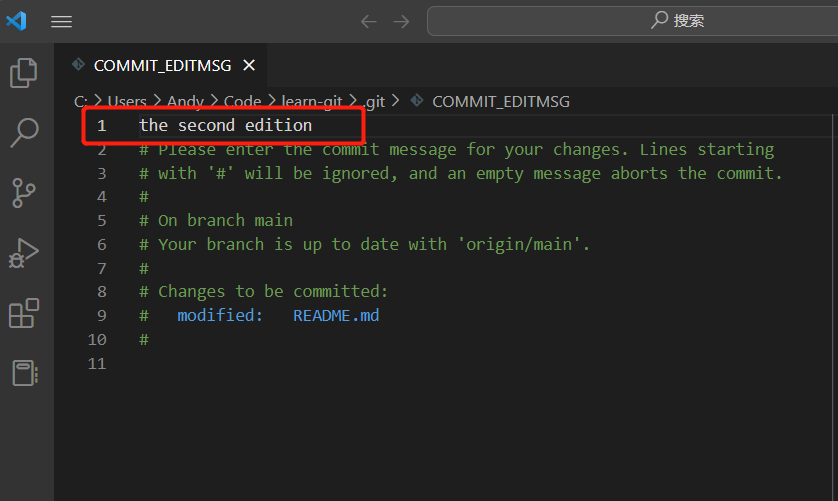
在命令行输入```git commit```命令后,系统会自动跳转到Vs Code界面,我们需要在第一行填写本次修改的备注信息,例如我在这里填写的是“the second edition”,然后关闭Vs Code界面。
关闭Vs Code界面之后,回到命令行界面,再用git status命令查看git的状态,观察前后的变化。
## 在github建一个远程仓库
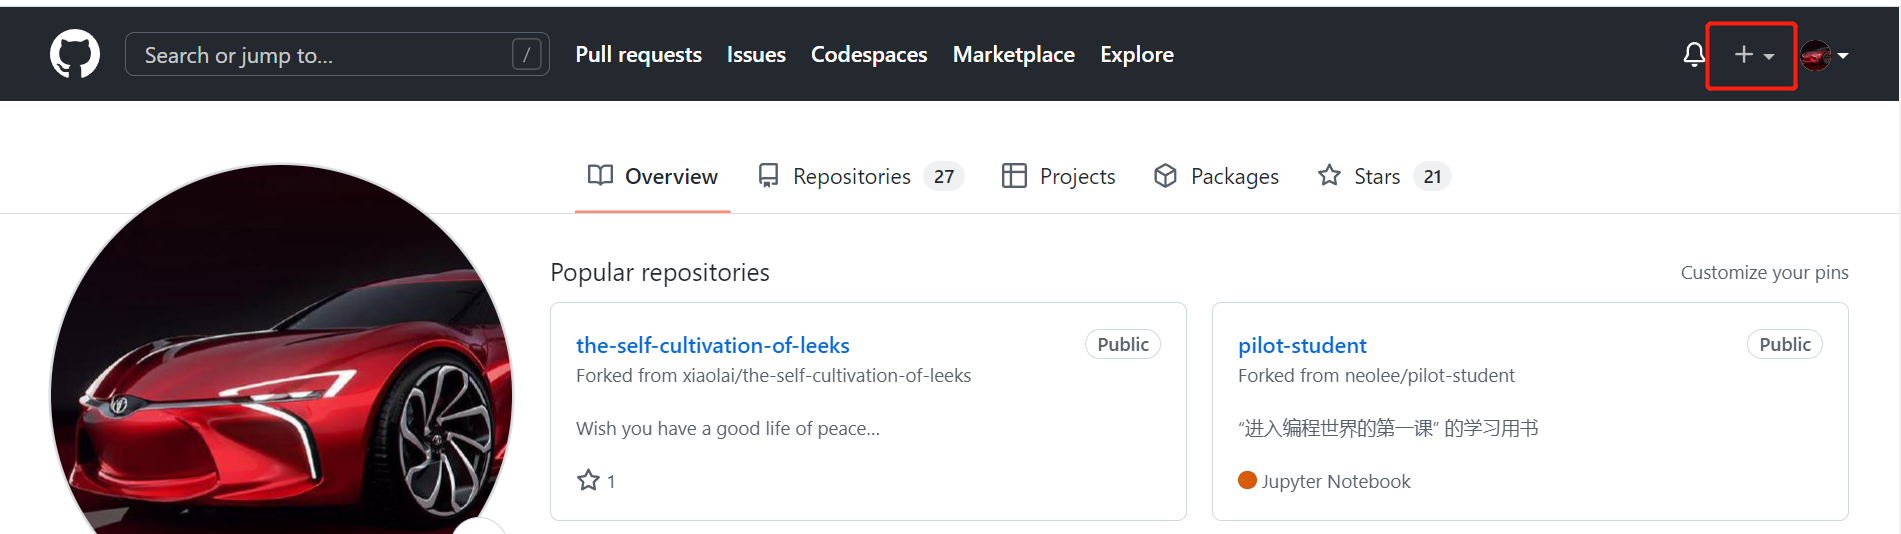
### 第1步:登陆自己的github账号
github网址:https://github.com/
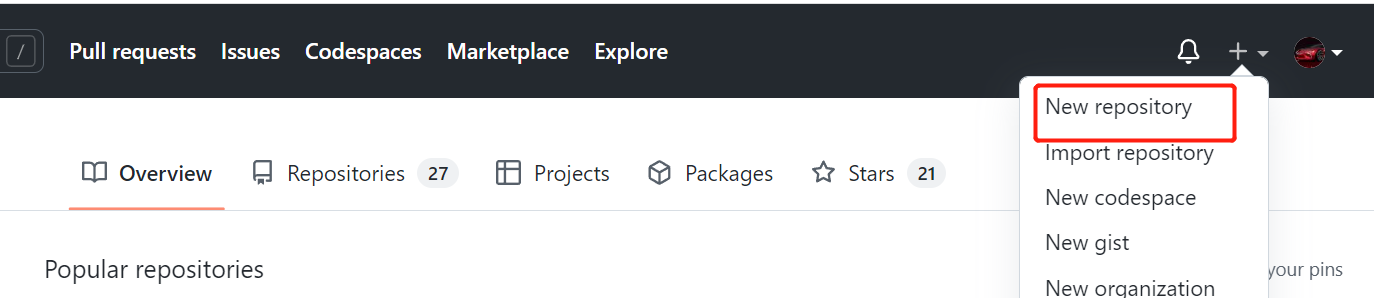
### 第2步:点右上角的“+”号
### 第3步:点“New repository”
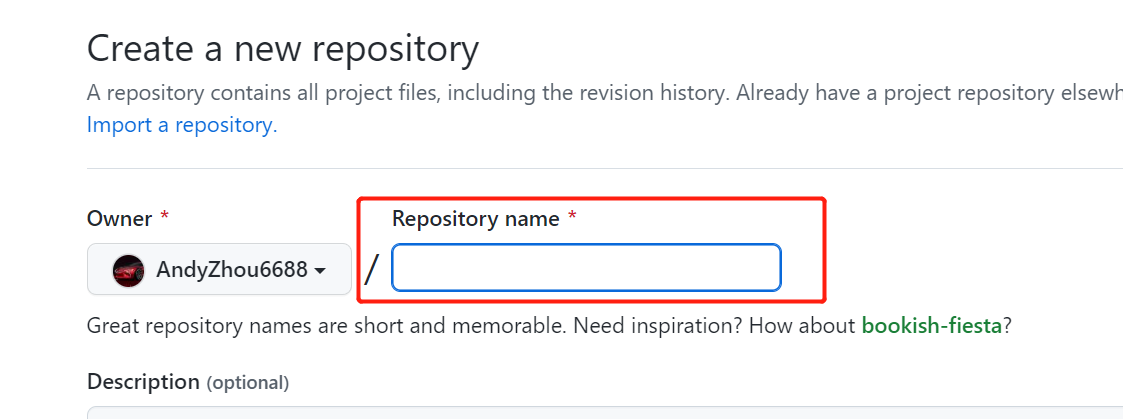
### 第4步:在红框处为该远程仓库命名,如“learn-git”
### 第5步:点“Create repository” 创建仓库
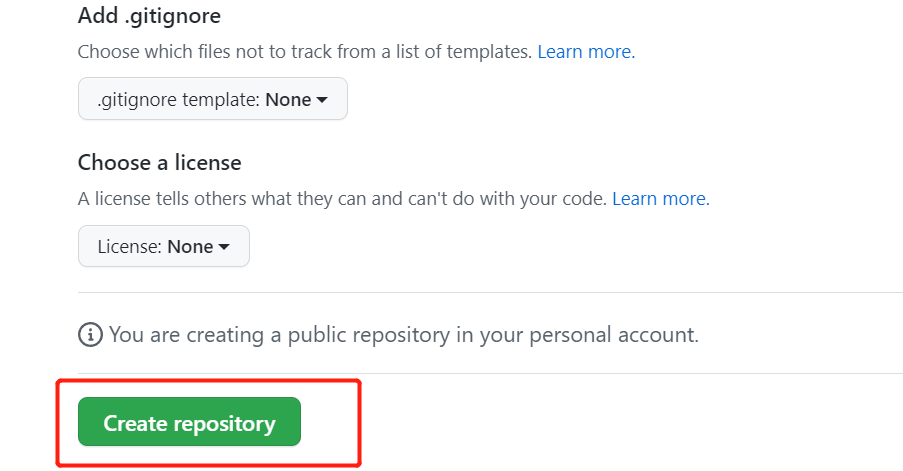
创建仓库时,为这个仓库取个名字就行,github远程仓库名称可以和本地仓库名称一致,也可以不一致,对于初学者来说,建议让本地文件夹名称和github远程仓库名称保持一致,这样方便我们学习。为仓库完成命名后,当前页面的其他选项保持默认状态,点击最下方的“Create repository”按钮。
## 三、把本地仓库(文件夹)和github远程仓库关联
### 第1步:选择本地仓库和刚刚建立的github远程仓库之间取得关联的方式
接上面步骤,点击“Create repository”之后,会弹出一个页面,从上到下有三个选项,分别是:
**…or create a new repository on the command line(\**使用命令行创建一个新的仓库\**)**
```jsx
echo "# leran-git" >> README.md
git init
git add README.md
git commit -m "first commit"
git branch -M main
git remote add origin <https://github.com/AndyZhou6688/leran-git.git>
git push -u origin main
```
**…or push an existing repository from the command line(把现存的本地仓库push到github)**
```jsx
git remote add origin <https://github.com/AndyZhou6688/leran-git.git>
git branch -M main
git push -u origin main
```
**…or import code from another repository(从其他仓库import代码)**
You can initialize this repository with code from a Subversion, Mercurial, or TFS project.
本教程中采用的是**第二种**方式,即“**…or push an existing repository from the command line(把现存的本地仓库push到github)**”

### 第2步:把本地仓库push到github
```jsx
git remote add origin <https://github.com/AndyZhou6688/leran-git.git>
git branch -M main
git push -u origin main
```
在当前工作目录下(刚刚创建的README.md文件所在的目录),这点很重要,千万不要弄错。
“git remote add origin https://github.com/AndyZhou6688/leran-git.git”这句话的意思是:让本地创建的仓库和github上创建的那个远程仓库关联起来。
“git push -u origin main” 这句话的意思是把本地仓库(文件夹)push(推)上github远程仓库
### 第3步:输入自己github仓库的账号和密码
如果配置了SSH登录,可以省去这个步骤。
### 第4步:刷新自己github上的“learn-git”仓库
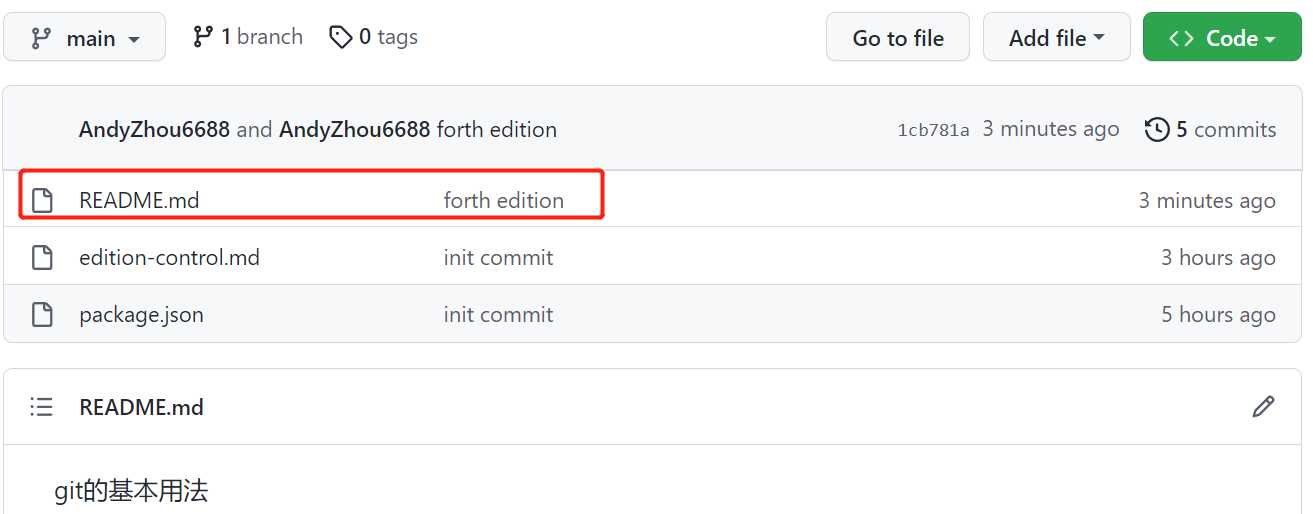
刷新后,可以看到我们在本地创建的“README.md”文件显示在github中“learn-git”这个仓库里了。
如果您完成了以上全部的步骤,恭喜,您又学会了一项新技能!
